
算力平台:
DiffEdit
[[open-in-colab]]
图像编辑通常需要提供要编辑区域的蒙版。DiffEdit 会根据文本查询自动生成蒙版,使你更容易创建蒙版,而无需使用图像编辑软件。DiffEdit 算法分三个步骤:
- 扩散模型根据一些查询文本和参考文本对图像进行去噪,从而为图像的不同区域生成不同的噪声估计;差异用于推断蒙版,以识别图像的哪个区域需要更改以匹配查询文本
- 使用 DDIM 将输入图像编码到潜在空间
- 使用蒙版作为指南,根据文本查询对扩散模型进行条件化,对潜在变量进行解码,这样蒙版之外的像素将保持与输入图像中的像素相同
本指南将向你展示如何使用 DiffEdit 编辑图像,而无需手动创建蒙版。
在开始之前,请确保你已安装以下库:
py
# uncomment to install the necessary libraries in Colab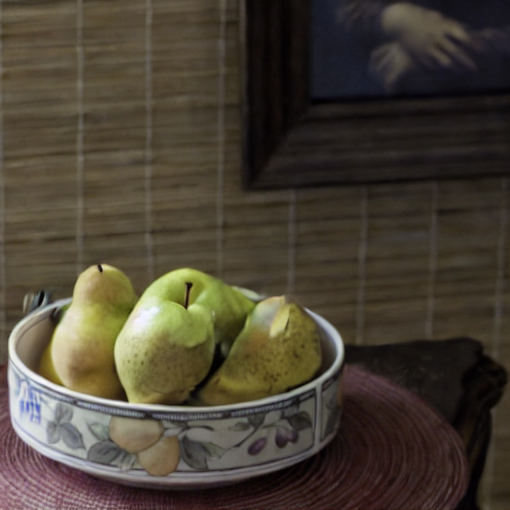
#!pip install -q diffusers transformers accelerate[StableDiffusionDiffEditPipeline] 需要一个图像掩码和一组部分反转的潜在变量。图像掩码由 [~StableDiffusionDiffEditPipeline.generate_mask] 函数生成,并包含两个参数,source_prompt 和 target_prompt。这些参数决定了图像中要编辑的内容。例如,如果你想将一碗 水果 变成一碗 梨子,那么:
py
source_prompt = "a bowl of fruits"
target_prompt = "a bowl of pears"
部分反转的潜在变量由 [~StableDiffusionDiffEditPipeline.invert] 函数生成,通常建议包含一个描述图像的 prompt 或 标题,以帮助引导反转潜在变量采样过程。标题通常可以是你的 source_prompt,但你可以随意尝试其他文本描述!
让我们加载管道、调度器、反向调度器,并启用一些优化以减少内存使用:
py
import torch
from diffusers import DDIMScheduler, DDIMInverseScheduler, StableDiffusionDiffEditPipeline

pipeline = StableDiffusionDiffEditPipeline.from_pretrained(
    "stabilityai/stable-diffusion-2-1",
    torch_dtype=torch.float16,
    safety_checker=None,
    use_safetensors=True,
)
pipeline.scheduler = DDIMScheduler.from_config(pipeline.scheduler.config)
pipeline.inverse_scheduler = DDIMInverseScheduler.from_config(pipeline.scheduler.config)
pipeline.enable_model_cpu_offload()
pipeline.enable_vae_slicing()
加载要编辑的图像:
py
from diffusers.utils import load_image, make_image_grid

img_url = "https://github.com/Xiang-cd/DiffEdit-stable-diffusion/raw/main/assets/origin.png"
raw_image = load_image(img_url).resize((768, 768))
raw_image
使用 [~StableDiffusionDiffEditPipeline.generate_mask] 函数生成图像蒙版。你需要将 source_prompt 和 target_prompt 传递给它,以指定要编辑图像的哪些内容:
py
from PIL import Image

source_prompt = "a bowl of fruits"
target_prompt = "a basket of pears"
mask_image = pipeline.generate_mask(
    image=raw_image,
    source_prompt=source_prompt,
    target_prompt=target_prompt,
)
Image.fromarray((mask_image.squeeze()*255).astype("uint8"), "L").resize((768, 768))
接下来,创建反向潜伏并传递一个描述图像的标题:
py
inv_latents = pipeline.invert(prompt=source_prompt, image=raw_image).latents最后,将图像蒙版和反向潜伏传递给管道。target_prompt 现在变为 prompt,source_prompt 用作 negative_prompt:
py
output_image = pipeline(
    prompt=target_prompt,
    mask_image=mask_image,
    image_latents=inv_latents,
    negative_prompt=source_prompt,
).images[0]
mask_image = Image.fromarray((mask_image.squeeze()*255).astype("uint8"), "L").resize((768, 768))
make_image_grid([raw_image, mask_image, output_image], rows=1, cols=3)
生成源和目标嵌入
源和目标嵌入可以使用 Flan-T5 模型自动生成,而不是手动创建。
从 🤗 Transformers 库加载 Flan-T5 模型和分词器:
py
import torch
from transformers import AutoTokenizer, T5ForConditionalGeneration

tokenizer = AutoTokenizer.from_pretrained("google/flan-t5-large")
model = T5ForConditionalGeneration.from_pretrained("google/flan-t5-large", device_map="auto", torch_dtype=torch.float16)
提供一些初始文本以提示模型生成源和目标提示。
py
source_concept = "bowl"
target_concept = "basket"

source_text = f"Provide a caption for images containing a {source_concept}. "
"The captions should be in English and should be no longer than 150 characters."

target_text = f"Provide a caption for images containing a {target_concept}. "
"The captions should be in English and should be no longer than 150 characters."
接下来,创建一个实用函数来生成提示:
py
@torch.no_grad()
def generate_prompts(input_prompt):
    input_ids = tokenizer(input_prompt, return_tensors="pt").input_ids.to("cuda")

    outputs = model.generate(
        input_ids, temperature=0.8, num_return_sequences=16, do_sample=True, max_new_tokens=128, top_k=10
    )
    return tokenizer.batch_decode(outputs, skip_special_tokens=True)

source_prompts = generate_prompts(source_text)
target_prompts = generate_prompts(target_text)
print(source_prompts)
print(target_prompts)
加载由 [StableDiffusionDiffEditPipeline] 使用的文本编码器模型以编码文本。你将使用文本编码器来计算文本嵌入:
py
import torch
from diffusers import StableDiffusionDiffEditPipeline

pipeline = StableDiffusionDiffEditPipeline.from_pretrained(
    "stabilityai/stable-diffusion-2-1", torch_dtype=torch.float16, use_safetensors=True
)
pipeline.enable_model_cpu_offload()
pipeline.enable_vae_slicing()

@torch.no_grad()
def embed_prompts(sentences, tokenizer, text_encoder, device="cuda"):
    embeddings = []
    for sent in sentences:
        text_inputs = tokenizer(
            sent,
            padding="max_length",
            max_length=tokenizer.model_max_length,
            truncation=True,
            return_tensors="pt",
        )
        text_input_ids = text_inputs.input_ids
        prompt_embeds = text_encoder(text_input_ids.to(device), attention_mask=None)[0]
        embeddings.append(prompt_embeds)
    return torch.concatenate(embeddings, dim=0).mean(dim=0).unsqueeze(0)

source_embeds = embed_prompts(source_prompts, pipeline.tokenizer, pipeline.text_encoder)
target_embeds = embed_prompts(target_prompts, pipeline.tokenizer, pipeline.text_encoder)
最后,将嵌入传递给 [~StableDiffusionDiffEditPipeline.generate_mask] 和 [~StableDiffusionDiffEditPipeline.invert] 函数,以及管道以生成图像:
diff
  from diffusers import DDIMInverseScheduler, DDIMScheduler
  from diffusers.utils import load_image, make_image_grid
  from PIL import Image

  pipeline.scheduler = DDIMScheduler.from_config(pipeline.scheduler.config)
  pipeline.inverse_scheduler = DDIMInverseScheduler.from_config(pipeline.scheduler.config)

  img_url = "https://github.com/Xiang-cd/DiffEdit-stable-diffusion/raw/main/assets/origin.png"
  raw_image = load_image(img_url).resize((768, 768))

  mask_image = pipeline.generate_mask(
      image=raw_image,
-     source_prompt=source_prompt,
-     target_prompt=target_prompt,
+     source_prompt_embeds=source_embeds,
+     target_prompt_embeds=target_embeds,
  )

  inv_latents = pipeline.invert(
-     prompt=source_prompt,
+     prompt_embeds=source_embeds,
      image=raw_image,
  ).latents

  output_image = pipeline(
      mask_image=mask_image,
      image_latents=inv_latents,
-     prompt=target_prompt,
-     negative_prompt=source_prompt,
+     prompt_embeds=target_embeds,
+     negative_prompt_embeds=source_embeds,
  ).images[0]
  mask_image = Image.fromarray((mask_image.squeeze()*255).astype("uint8"), "L")
  make_image_grid([raw_image, mask_image, output_image], rows=1, cols=3)
生成用于反转的标题
虽然你可以使用 source_prompt 作为标题来帮助生成部分反转的潜在变量,但你也可以使用 BLIP 模型来自动生成标题。
从 🤗 Transformers 库加载 BLIP 模型和处理器:
py
import torch
from transformers import BlipForConditionalGeneration, BlipProcessor

processor = BlipProcessor.from_pretrained("Salesforce/blip-image-captioning-base")
model = BlipForConditionalGeneration.from_pretrained("Salesforce/blip-image-captioning-base", torch_dtype=torch.float16, low_cpu_mem_usage=True)
创建一个实用函数,从输入图像生成标题:
py
@torch.no_grad()
def generate_caption(images, caption_generator, caption_processor):
    text = "a photograph of"

    inputs = caption_processor(images, text, return_tensors="pt").to(device="cuda", dtype=caption_generator.dtype)
    caption_generator.to("cuda")
    outputs = caption_generator.generate(**inputs, max_new_tokens=128)

    # offload caption generator
    caption_generator.to("cpu")

    caption = caption_processor.batch_decode(outputs, skip_special_tokens=True)[0]
    return caption
加载输入图像并使用 generate_caption 函数生成标题:
py
from diffusers.utils import load_image

img_url = "https://github.com/Xiang-cd/DiffEdit-stable-diffusion/raw/main/assets/origin.png"
raw_image = load_image(img_url).resize((768, 768))
caption = generate_caption(raw_image, model, processor)现在你可以将标题放入 [~StableDiffusionDiffEditPipeline.invert] 函数中以生成部分反转的潜伏变量!